


Table of Contents
ToggleCall of Duty: Ghosts delivered one of the franchise’s most diverse map pools when it launched in 2013, and nearly a decade later, these arenas remain compelling studies in multiplayer design. Whether you’re revisiting the game on PS3, Xbox 360, PS4, or Xbox One, or diving in for the first time, understanding the strengths of each Call of Duty Ghosts map is crucial for climbing the ranks and securing victories. From claustrophobic urban corridors to sprawling desert fortifications, Ghosts’ map design philosophy balances accessibility for casual players with enough strategic depth to reward competitive teams. This guide covers every major multiplayer arena, breaks down what makes them tick, and hands you the tactics to dominate regardless of the terrain.
Key Takeaways
- Call of Duty Ghosts maps use tri-layer verticality design with ground-level, mid-range interiors, and elevated positions that require adaptive loadout strategies for success.
- Small maps like Strikezone and Warhawk demand aggressive SMG play and fast reflexes, while large maps like Siege and Stonehaven require coordinated squad play and sniper positioning.
- Map control on Ghosts maps means dominating chokepoints and power positions—the central marketplace on Strikezone, fortress interior on Siege, or castle rooftop on Stonehaven—to force enemies into predictable rotations.
- Weapon selection varies by map size: SMGs for small maps, balanced assault rifles for medium maps, and specialized loadouts (snipers or close-range) for large maps depending on engagement distance.
- Communication and defined team roles separate winning teams from solo players, with consistent call-outs using specific map landmarks and coordinated positioning essential across all Ghosts map layouts.
- Call of Duty Ghosts maps remain strategically relevant with unique features like destructible elements, environmental hazards, and asymmetrical designs that reward map knowledge over pure mechanical skill.
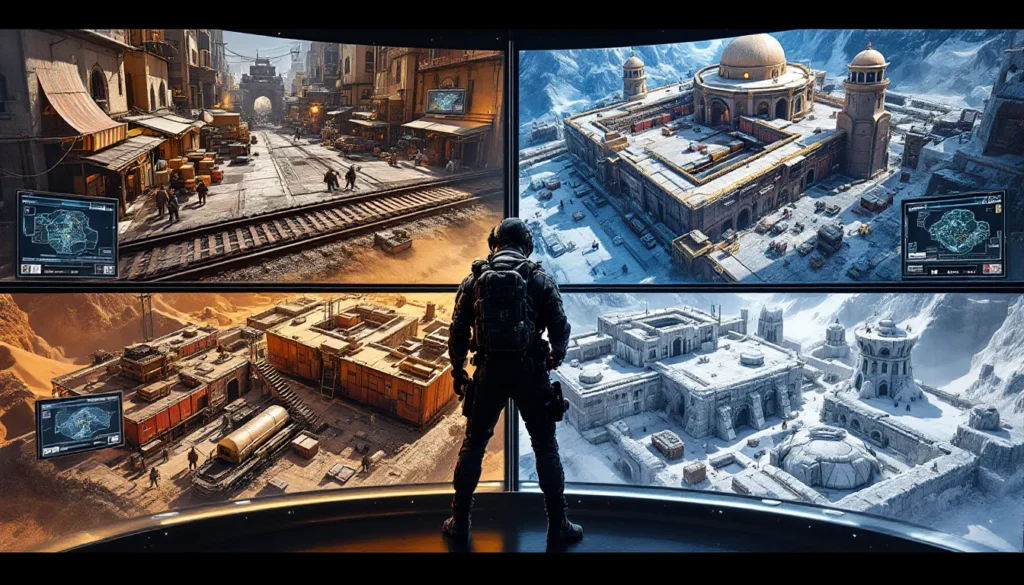
What Makes Call Of Duty Ghosts Maps Unique
Core Design Philosophy And Features
Call of Duty: Ghosts maps were built with a deliberate focus on verticality, destructible elements, and varied engagement ranges. Unlike the more linear designs of Modern Warfare 3, Ghosts embraced dynamic map layouts with multiple sight lines, rooftop vantage points, and environmental hazards that changed how players approached each objective. The game’s maps encouraged movement across three distinct layers: ground level for close-quarters combat, mid-range building interiors, and elevated positions for sightline control. This tri-layer design meant that loadouts and positioning strategies couldn’t be one-size-fits-all, your Marksman Rifle worked best holding long angles from rooftops, while your teammate with an SMG had to navigate tight corridors and courtyards.
Many Ghosts maps also incorporated environmental destruction or interactive elements. Doors could be breached, windows could be shot through, and in some cases, natural hazards like falling debris or moving obstacles added unpredictability. This kept matches fresh because the optimal route from A to B wasn’t always obvious after the first few spawns.
How Ghosts Maps Compare To Other Call Of Duty Titles
Compared to Black Ops 2, Ghosts maps tend to feel more spacious and less “designed around every angle.” Black Ops 2 maps like Standoff had tighter, more intentional sightline architecture, while Ghosts maps rewarded players who explored and found secondary routes. Advanced Warfare, which came next, leaned harder into verticality with thrust jump mobility, making its maps feel more like three-dimensional puzzles. Ghosts, by contrast, keeps verticality grounded, rooftops and windows matter, but you’re not bouncing between platforms at light speed.
When stacked against Modern Warfare (2019) and the newer titles, Ghosts maps feel smaller and more intimate, with fewer power positions and more contested zones. This makes Ghosts matches faster-paced in close-quarters scenarios, though the larger Ghosts maps like Stonehaven or Siege can feel just as methodical as anything in the modern era. The key difference is that Ghosts rarely had the ultra-long sightlines (like Downtown in Modern Warfare) where one LMG player could shut down an entire flank for four minutes straight. Most engagements in Ghosts happened at 20–40 meters, making aggressive SMG and assault rifle play highly viable across the board.
Small And Tight Maps For Aggressive Gameplay
Strikezone: Urban Chaos In The Middle East
Strikezone is pure aggression distilled into one tight urban combat zone. Set in a Middle Eastern marketplace under active military assault, this map is dominated by close-quarters engagements, with most gunfights happening under 20 meters. The central marketplace is where the action happens, crates, market stalls, and narrow alleyways create constant crossfires and blind corners. Spawn traps are real on Strikezone, especially in modes like Team Deathmatch, because one dominant team can lock down the central market and force the opposing team into spawning at the far ends where they’re isolated.
For aggressive play, Strikezone demands fast reflexes and weapon accuracy over positioning. Submachine guns like the Vector K10 dominate here, though an assault rifle with high hipfire accuracy can work if you’re playing tighter. Avoid using precision weapons or snipers on Strikezone, by the time you’re scoped in, someone has flanked you through one of the many back passages. The map’s tight corridors also make explosive perks like Danger Close lethal, so consider running blast radius perks if your opponents favor grenades.
Freight: Industrial Combat On The Rails
Freight centers around an industrial rail yard with boxcars, crane structures, and warehouses. Even though being one of the smaller Ghosts maps, it’s slightly more strategic than Strikezone because height and cover matter more. Players holding the train cars and warehouse rooftops can control large portions of the map, but the open rail yard in the center punishes teams that can’t challenge those elevated positions.
This is one of the few small Ghosts maps where a sniper can thrive if positioned correctly, the warehouse rooftops and crane overlooking the central tracks create natural sightlines. But, aggressive SMG players still have the edge by using the ground-level containers as cover and rushing through the warehouse. The key is knowing which boxcars are on which tracks: the layout feels chaotic on first glance, but repeated plays reveal two or three dominant routes that separate good players from great ones.
Warhawk: Rooftop Warfare In The City
Warhawk is a vertically-focused small map set on interconnected city rooftops and building interiors. Unlike Strikezone’s ground-focused firefights, Warhawk forces players into multi-level combat constantly. Jumping between rooftops, sliding down ramps, and fighting through narrow interior hallways means your spatial awareness gets tested immediately. Shotguns and close-range assault rifles thrive here because most engagements happen at point-blank range on rooftops or in tight stairwells.
The map’s primary weakness is that it’s extremely spawn-trap heavy. If one team captures the central rooftop cluster, they can pin the opposing team into one corner of the map. Smart spawn positioning and coordinated pushes are necessary to break out of a spawn trap, making Warhawk one of the more team-play dependent small maps in the Ghosts rotation.
Medium-Sized Maps For Balanced Multiplayer Action
Sovereign: Coastal Base Showdown
Sovereign takes place at a coastal military base with beach access, concrete fortifications, and interior bunker complexes. It’s a mid-sized map that balances fast-paced action with strategic positioning. The beach is relatively open, making it dangerous to cross in a straight line, but the bunker interiors offer close-quarters opportunities and multiple flanking routes. Teams that control the elevated observation towers can call out enemy movements across the open beach, which is critical in objective modes like Domination or Capture the Flag.
For Sovereign, a balanced loadout works best, bring an assault rifle that can handle 20–40 meter engagements and be ready to switch to a shotgun or SMG when you push bunker corridors. Players who only specialize in one range tend to struggle here because you’re forced into both types of engagements within a single life. The map rewards smart positioning over pure mechanical skill: knowing when to hold the beach and when to collapse into bunker defense separates winning teams from losing ones.
Overlord: Destroyed City Streets
Overlord is arguably one of the best-balanced medium maps in Ghosts. Set in a bombed-out city block with destroyed vehicles, collapsed buildings, and urban rubble, it offers distinct engagement zones: tight alley-fighting around the central destroyed plaza, medium-range combat across the wider streets, and long-sightline opportunities from building windows overlooking the main intersection. Because each zone rewards different playstyles, Overlord feels fair whether you’re running an aggressive SMG setup or a defensive marksman rifle.
The central plaza is the hottest zone, controlling it with grenades and explosive perks gives your team map control over the majority of the engagement points. But, teams that ignore the surrounding buildings get picked off by elevated snipers and long-range assault rifles. Balanced team composition is essential here: one player holding the plaza while teammates control the flank routes creates a dominant setup.
Containment: Military Complex Combat
Containment is set inside and around a fortified military complex with multiple buildings, truck beds, and narrow corridors. It’s slightly larger than Sovereign but smaller than Siege, making it a true mid-tier map. The central warehouse and surrounding prefab structures create confined spaces, but outdoor areas between buildings offer medium-range firefights. What makes Containment unique is how interconnected everything is, there are nearly as many doors and windows as there are walls, meaning flanks happen constantly.
This constant flank potential makes Containment exhausting but rewarding for players with high situational awareness. Spawn camping is less of a problem here than on Strikezone or Warhawk because exits from spawn areas aren’t single corridors. Teams looking to dominate Containment need players who can watch multiple angles simultaneously, and communication becomes absolutely critical when you’re covering three exits from the same building.
Flooded: Underground Waterway Battles
Flooded takes the action underground into a subway or tunnel system, partially submerged in water. It’s claustrophobic in some sections and surprisingly open in others, creating an odd but compelling layout. The water affects movement speed, and areas fully submerged are slower to traverse, which creates natural chokepoints where grenades become incredibly powerful. Players holding the dry elevated platforms have a major advantage over those pushing through water-filled corridors.
For Flooded, map knowledge is everything. The wet sections slow you down, making you vulnerable to grenades and to players holding dry vantage points. Learning which routes are fully dry and which ones are partially water-filled separates players who understand the map from those just running around. The perks Stalker and Resilience help with underwater movement, but good spacing and explosive awareness matter more than any single loadout choice.
Large Maps For Strategic And Squad-Based Play
Siege: Desert Fortress Tactics
Siege is a sprawling desert map built around a central fortress with multiple structures, guard towers, and open sandy areas. It’s one of the largest maps in Ghosts and demands coordinated team play, players can’t just go lone-wolf here because the map is too big to hold solo. Teams need to establish a perimeter, control key structures, and rotate as a unit to defend objectives or respond to enemy pushes.
The central fortress is the dominant feature, with rooftop access, interior corridors, and underground areas. Teams holding the fortress control the map because every major flank route leads through or around it. Attackers have to coordinate distraction pushes (one team pinning the fortress defenders while another flanks) to have any success. Snipers thrive on Siege because there are genuine long-sightline opportunities from tower to tower, and the open areas between structures are dangerous to cross.
For competitive play on Siege, squads typically establish two defending positions: one player holding the fortress interior, one on the rooftops, and two players controlling the outer perimeter and responding to flanks. Offensive setups require scouts to probe defense, with heavier weapons pushing the main threat once defenders are split.
Stonehaven: Castle Grounds Warfare
Stonehaven is the spiritual successor to the castle-themed maps that have appeared throughout Call of Duty history (like Castle from World at War). Set around an ancient stone fortress with surrounding grounds, destroyed walls, and scattered ruins, it’s atmospheric and strategically dense. Unlike Siege, Stonehaven has more verticality, the main castle structure offers multiple levels, balconies, and internal corridors that create three-dimensional combat scenarios.
Control of the castle interior is essential but not sufficient for victory. Teams also need to hold the surrounding outer walls and grounds to prevent enemy flanks from the rear. Good Stonehaven play involves assigning dedicated players to hold the castle (with one roaming teammate) while the remaining players hold outer approach routes. The map rewards squad discipline because random rushing gets punished by coordinated crossfires from multiple defender positions.
Sniping on Stonehaven is viable but trickier than Siege because lines of sight are broken up by castle walls and ruins. Long-range assault rifles are often better because you need to stay mobile and reactive, not locked into one sightline.
Whiteout: Arctic Warfare And Stealth
Whiteout is set in a snowy arctic base with white structures, frozen terrain, and limited visibility due to weather effects. It’s one of the largest maps in Ghosts and emphasizes stealth and positioning because the open snowy areas are extremely dangerous to cross in the open. Players who sprint across the frozen ground get picked off from buildings and structures, so movement is slow and methodical.
For a large map, Whiteout plays surprisingly defensively. Teams tend to entrench in buildings and structures, with limited aggressive pushing because the open ground is a death zone. Perks like Cold Blooded (reducing thermal detection) and Ping (reducing minimap visibility from your gunfire) become more valuable here than on smaller maps. Also, the white color palette can cause visibility issues at range, some players disable certain graphics settings to improve target visibility, though that’s a personal preference and not essential.
Guerrilla: Jungle Warfare And Ambushes
Guerrilla is a sprawling jungle map with overgrown vegetation, tribal structures, and natural elevation changes. It’s one of the most asymmetrical large maps in Ghosts, with dense jungle on one side and more open clearing on the other. This imbalance creates unique gameplay where teams are constantly navigating different terrain types and adapting their strategies.
The jungle areas are perfect for ambush-style play, SMG and shotgun rushes through dense foliage catch defenders off-guard, especially players expecting traditional sightline-based combat. But, the open clearing punishes aggressive rushing and rewards static defense. Smart teams adapt their approach per objective and per life: pushing through jungle when enemies are clustered around a flag, but holding the clearing when defending against a potential flank.
Perks like Hunted (creating a visible red marker on your location) are particularly punishing on Guerrilla because the jungle terrain makes it hard to reposition away from marked spots. Conversely, perks that reduce visibility (Cold Blooded, Ping) are extremely valuable.
Specialized Maps For Unique Game Modes
Onslaught Mode Maps And Mechanics
Onslaught is Ghosts’ answer to Zombies, but instead of undead, players face off against alien creatures called the Cryptids. These specialized maps are designed for squad-based survival rather than traditional multiplayer, with different layout priorities. Maps like Fog, Mayday, and Nightfall feature more defensive choke points, ammunition caches, and elevated positions because squad positioning against waves of aliens requires completely different spatial awareness than multiplayer PvP.
In Onslaught maps, establishing a defensible position is critical. The best teams find a room or corridor with limited entry points, set up overlapping fields of fire, and hold a perimeter while aliens attack. Weapon choice matters less than ammo management, keeping enough munitions to handle multiple waves determines success more than having the “best” gun. Understanding alien spawning patterns and wave timing is essential knowledge that multiplayer map sense doesn’t teach: you need dedicated Onslaught practice to master these maps.
Extinction Mode Environments
Extinction is the alien hive-destruction mode, and its maps are even more specialized than Onslaught. Players must move through hostile alien territory to plant charges on alien hives, which means Extinction maps require constant rotation and aggressive movement, not static defense. Maps like Nightfall, Mayday, and Point of Contact feature linear progression paths with multiple hive locations, forcing teams to navigate and fight their way through alien-infested zones to complete objectives.
Extinction maps reward mobility and squad cohesion, falling behind the group gets you surrounded by aliens, while overextending ahead gets your team split. The best Extinction players treat these maps like a coordinated heist: scout ahead, clear threats, establish control of each section, then move forward. Loadout flexibility matters because you’ll face both close-range alien rushes and ranged alien threats (like the Seeker aliens that attack from distance).
Players looking to explore Call of Duty Ghosts Extinction: The Ultimate Co-Op Challenge You Can’t Miss will find these specialized map dynamics rewarding if they appreciate cooperative gameplay over competitive PvP.
Pro Tips For Dominating Every Ghosts Map
Map Control And Positioning Strategies
Map control isn’t about holding every inch of terrain, it’s about controlling the rotations and chokepoints that force enemies into predictable positions. On small maps like Strikezone, controlling the central market means setting up crossfires from two different angles so enemies are caught in overlapping fire whenever they try to push through. On large maps like Stonehaven, controlling the castle interior means denying the enemy access to the high ground and forcing them into the open outer areas where they’re vulnerable.
The key positioning strategy across all Ghosts maps is identifying one or two power positions per map and assigning defensive players to hold them while roaming teammates handle off-angle threats. Power positions vary by map, the central rooftop on Warhawk, the central marketplace on Strikezone, the fortress interior on Siege, but the principle stays the same: control the central advantage, and the rest of the map falls into line. Also, understanding spawning mechanics helps you predict enemy rotations: if the enemy spawns at the far end of Overlord, you know they’ll rotate toward the central plaza, so set up an ambush along that rotation path.
Weapon Selection For Different Map Sizes
Small maps demand SMGs and aggressive assault rifles because most engagements happen under 25 meters. The Vector K10 and Vektor K7 are the gold standard SMGs for Strikezone and Warhawk due to their extreme close-range superiority. If you prefer assault rifles on small maps, choose ones with high hip-fire accuracy and fast TTK (time-to-kill), like the MTAR-X.
Medium maps like Sovereign and Overlord favor balanced assault rifles and tactical rifles. Weapons like the SA-805 and AK-12 work across the 20–40 meter sweet spot without forcing you into specialized ranges. You’ll face SMG rushers and sniper positions, so bringing a weapon that can compete in multiple scenarios matters more than maximizing one specific advantage.
Large maps reward specialized loadouts because engagement distances are predictable. Snipers like the L118A dominate long-sightline areas on Siege and Stonehaven, while defending teams holding interior positions can equip SMGs for close-quarters encounters when attackers breach. The best large-map players run class variety and switch between loadouts based on the objective and team positioning. To deepen your tactical knowledge, Mastering Call of Duty: Essential Tricks and Tips for Better Gameplay offers additional strategic insights beyond individual weapon selection.
Communication And Team Coordination Essentials
Communication separates good teams from great teams on Ghosts maps. Calling out enemy positions isn’t enough, you need to communicate intent (“I’m holding the fortress, you three hold the outer perimeter”), threat assessment (“Two enemy SMG players pushing left corridor”), and positioning changes (“Shifting to the right flank, watch the center”). Teams with constant communication dominate teams with superior mechanical skill because they’re coordinating around the map layout instead of playing individually.
Specific call-outs tied to map geography are essential. On Stonehaven, calling “Two enemy players on the north wall” is more helpful than “Enemies north” because the castle is large and teammates need specificity to respond effectively. Learn distinct landmarks on each map and train your team to use consistent terminology, if everyone calls the elevated platform on Containment something different, communication breaks down instantly.
Finally, team roles matter. Designate one player as a primary entry fragger, one as a support/positioning player, one as a scout/information gatherer, and one as a defensive anchor. Each role demands different weapon choices and positioning strategies, but the consistency lets teammates predict each other’s movements and cover each other’s weaknesses. Teams with clearly defined roles who understand how Ghosts’ map design plays into their role assignment outperform teams with five equally skilled solo players who treat multiplayer as a deathmatch.
Conclusion
Call of Duty: Ghosts’ map design remains a masterclass in multiplayer arena architecture, even as the franchise has evolved with newer titles. From the aggressive chaos of Strikezone to the methodical fortress control of Stonehaven, these maps reward players who understand positioning, communication, and how to leverage map geography against opponents. Whether you’re dominating on PS5 or diving back into the PS3 original, the fundamental principles of map control, identifying power positions, denying enemy rotations, and coordinating team assignments, remain the same.
The diversity in Ghosts’ map pool means every playstyle has a home. Aggressive SMG pushers thrive on small maps, balanced assault rifle players find their rhythm on medium maps, and strategic sniper-focused teams control large maps. Rather than trying to be equally proficient on every map immediately, focus on mastering one size category first, then expand your map knowledge outward. Stack this with solid communication practices and defined team roles, and you’ll notice your win rate climbing across the entire rotation.
If you’re interested in the broader universe of Call of Duty, Call Of Duty Archives – Surfsizenow provides ongoing coverage of tips, guides, and news that’ll keep you sharp across the entire franchise. Maps change, metas shift, and new content arrives, but the principles that make Call of Duty multiplayer compelling, mastering your environment, coordinating with teammates, and executing your role, endure forever.